Things have taken a bit of time to settle down after the visit and with heaps going on at work at the moment, we are full on. I have been playing a bit today to try and get back into the sewing groove again and will have a small needlecase tutorial to put up as soon as I can get it to a decent standard.
Anyone interested in a needlecase tutorial albiet a small one, but a good size to pop into a handbag etc
Sunday, July 12, 2009


Monday, June 22, 2009
Biggest Surprise Ever
Its been a week of big things happening for us, had the MIL’s 80th and knew all the family were coming from overseas and all over New Zealand to catch up with her (further pictures in the post below)
BUT……… last Monday evening just as we were going to have an early night (phew lucky we didn't) we had a knock on our door and nearly had a heart attack there and then – these two below were at our door and had come all the way from Australia to surprise their Dad…… who had not seen them in years…….. to say he's the happiest Dad in the world would be the biggest understatement of the year LOL…… Its been the best time and we have another week yet so expect a few photos to go up on the blog, I think there might be many tears when they head out on their plane next weekend (me included) its been awesome…….
Daniel and Amy with their Nana who cried buckets when she saw them for the first time in a very long time, was the perfect birthday present for her.

I call this picture The Happiest Dad in the world……….

Pictures of MIL’s 80th Birthday
Sorry to be away from the blog for so long, but the quilt I was making was for my MIL’s 80th birthday and I needed to spend every bit of time after work to get it finished in time. Below are some pictures of the finished quilt and of her opening the parcel at her birthday bash… not a great pic of the quilt as it was a very sunny day when I took it and it got washed out, will take some more of it on her bed when I go up and see her at the home.
Quilt finished and washed and dried in the dryer

This was a classic she opened the parcel and opened her mouth then closed the parcel up again LOL….in shock

Parcel opened and quilt being held up to show everyone

Me with MIL and the quilt, was bending way down here for the photo LOL as she was sitting in a wheelchair

Saturday, June 6, 2009
Nearly an update to come LOL
Sorry everyone, been so busy at work the past few weeks and needing to work on the quilt in any spare time there has been little time to update the blog.
I have been to my monthly doll club meeting today though so look for some pictures tomorrow, also am nearly finished the quilt just need to do the hand sewing on the binding and all good to go. THEN.......... I shall continue with the faces and get those up for you and back into doll making...........
I have been to my monthly doll club meeting today though so look for some pictures tomorrow, also am nearly finished the quilt just need to do the hand sewing on the binding and all good to go. THEN.......... I shall continue with the faces and get those up for you and back into doll making...........
Friday, May 15, 2009
What got started last weekend

Well sorry girls, no doll face updates so far, have a sewing job I need to concentrate on for the next wee bit, a bit of pressure to get this done as a gift so am winging another quilt LOL.... nearly got the top finished just need to get the final borders on this weekend and then backing and wadding - phew...........fingers crossed I can get it to that stage so I can start the quilting as that takes me a bit of time indeed. Above is the progress so far.
Thursday, May 7, 2009
Update on faces will be coming soon LOL

I am hoping to get some more pics of the faces nearly done over the weekend, I have sealed two of them so can continue on - just have to do some housework tomorrow...........ewwwwwwwwww nasty I know but then I have a couple of days to myself to craft (fingers crossed)....... I went to town today to get my mug shot taken for a passport as I am heading to Australia for a retreat in September so its all go from here on in. (Well in my head its a go, my body is still frozen in fear of those planes I kid you not, I shall be a blithering jelly boarding the plane)
Tuesday, May 5, 2009
Pay it Forward

I was visiting my friend Pams blog today and noticed she had a "pay it forward" going on there. So in I went to make my comment LOL and now I am in the "game" so to speak.
Sooooooo heres the rules girls and boys..........
PAY IT FORWARD CHALLENGE
is an act of kindness done with no expectation of anything in return but the hope that the recipient of the gift will continue the challenge.....
I start by promising to make and send (3) gifts for the first(3) FRIENDS who post a comment to this post....I hope you will promise to post the challenge announcement on your blogs and carry forth the promise to gift (3) friends with a gift each!
MY PROMISE
I will send out the (3) gifts within 365 days! You will not know when....please don't forget to leave your email so that I can answer your post! lol..
is an act of kindness done with no expectation of anything in return but the hope that the recipient of the gift will continue the challenge.....
I start by promising to make and send (3) gifts for the first(3) FRIENDS who post a comment to this post....I hope you will promise to post the challenge announcement on your blogs and carry forth the promise to gift (3) friends with a gift each!
MY PROMISE
I will send out the (3) gifts within 365 days! You will not know when....please don't forget to leave your email so that I can answer your post! lol..
Saturday, May 2, 2009
Update on drawing faces
Ok so here we go again, hope I am not boring you lot with all this as I have taken a heap of photos today, below is the other two faces pencilled in and just the start of colouring them


A bit more colour on this face and the one further below


Starting to put some colour on the lips


Now on one of the faces I am not happy with the iris placement so am going to attempt to fix it, in the below pictures the iris on the left is places way to far inside the outline of the eye so I am using a white gel pen to try and blot it out and then once its dry (this will take a few applications) I will try and get some more green over the top and then make the iris line further out – fingers crossed it works
the below pictures the iris on the left is places way to far inside the outline of the eye so I am using a white gel pen to try and blot it out and then once its dry (this will take a few applications) I will try and get some more green over the top and then make the iris line further out – fingers crossed it works
First layer laid down and its very see through, just let it dry and then in the next picture pop a bit more over to start to make it disappear. 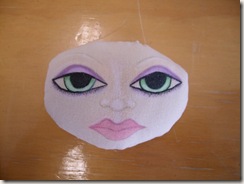


Friday, May 1, 2009
Smal Update no pics

Just sending this by email, so convenient to be able to do this on the fly, well lets hope so when this hits the blog.
Just finished stuffing the other two faces which I will take to my doll club tomorrow and carry on with the faces, so there should be quite a lot of pictures to go up on Sunday ( all going well)
Now just another tip I thought of to tell you all as I was stuffing these flat heads. The trick to getting a nice smooth finish on the edges is to spritz them with water as you stuff them - (because I had drawn the face on already I just spritzed the back of the head and not the front) you can even run an iron (hot of course) over the seam line to help dry it if you want and this then contracts the cotton back on the stuffing. Before doing that take your sewing needle and pop it into the face just a wee bit from the seam and then pull the stuffing forward with your needle until its all nicely sitting in the chin or face edge. - you can do this from the back, although if you make little holes in the cotton with your needle doing this, just run your fingernail over the wee hole and it will disapear- Last tip, DONT over stuff these flat heads they just need enough to fill them out not make them hard as rocks........I roll them with my hand as well once stuffed to distrubute the stuffing about and get them all nicely shaped.
Hope these tips help someone............
Wednesday, April 29, 2009
Next installment of face pictures
Hello again, well I managed to get a wee bit more done of the doll face, I have just started one eye so you can see the difference adding a bit here and there makes. Now in showing this process - things happen and this face may not work out yet - as often happens, of course this will be just my luck to happen when I decide to show how I do them......... of course LOL..... I have two more which I will stuff and start as well so fingers crossed one of em will work out. This one has very oversize eyes but with hair etc and a small body this can make a bit of a statement, (well that's just my opinion and of course I am covering my bum in case it goes wrong he he)
Anyways this next picture shows the start of putting a bit of extra oomph on to the eye area, I am never finished until its finished I can change things all the time and colours until I am happier with it, although a lot of times I am not happy with the finished product as most doll makers would attest, we are all our own worst critics.

In this picture below you can see more black has been added to the eye and the iris and some shading under the eye

Next one below, I have added some wispy eyelashes (I hate doing eyelashes and most times don't do them on dolls, certainly not on the upper eye, usually just do a very dark thick eyeliner effect, but every now and again I attempt bottom lashes)

And just a closer look at the eye, my gosh really putting myself out here Eeek LOL anyways gives a good look at the penciled in eyes and mouth as well, I also struggle with mouths so we shall see how this one goes. This face also has to have shading done as well and of course both eyes need to be done so as soon as I have more time I will continue on and take more pictures, hopefully with the other two faces as well.

Subscribe to:
Posts (Atom)